I've had a lot of time on my hands lately. I'm sure I'm not alone in this respect.
Both Elle and I are both working full-time from home, which brings it's fair share of challenges: the distractions of household chores and two pet cats begging for attention; our uncomfortable 'office' furniture; the absence of any clean differentiation between 'work' and 'play' time.
This is not to say working from home hasn't presented a host of unexpected benefits, however. We no longer have to spend more than two hours every day on the commute to and from work. Therefore (in addition to giving ourselves an extra hour in bed!) we are able finish work mid-afternoon without having to change our working pattern, and make the most of already being home. Working from home also means that lunch breaks can consist of more than eating a sandwich in one of the slightly less busy corners of the office: quick meals can be prepared under the grill or on the hob, lunchtime walks taken to stretch our legs or collect wild foods (including a recently discovered swathe of wild fennel).
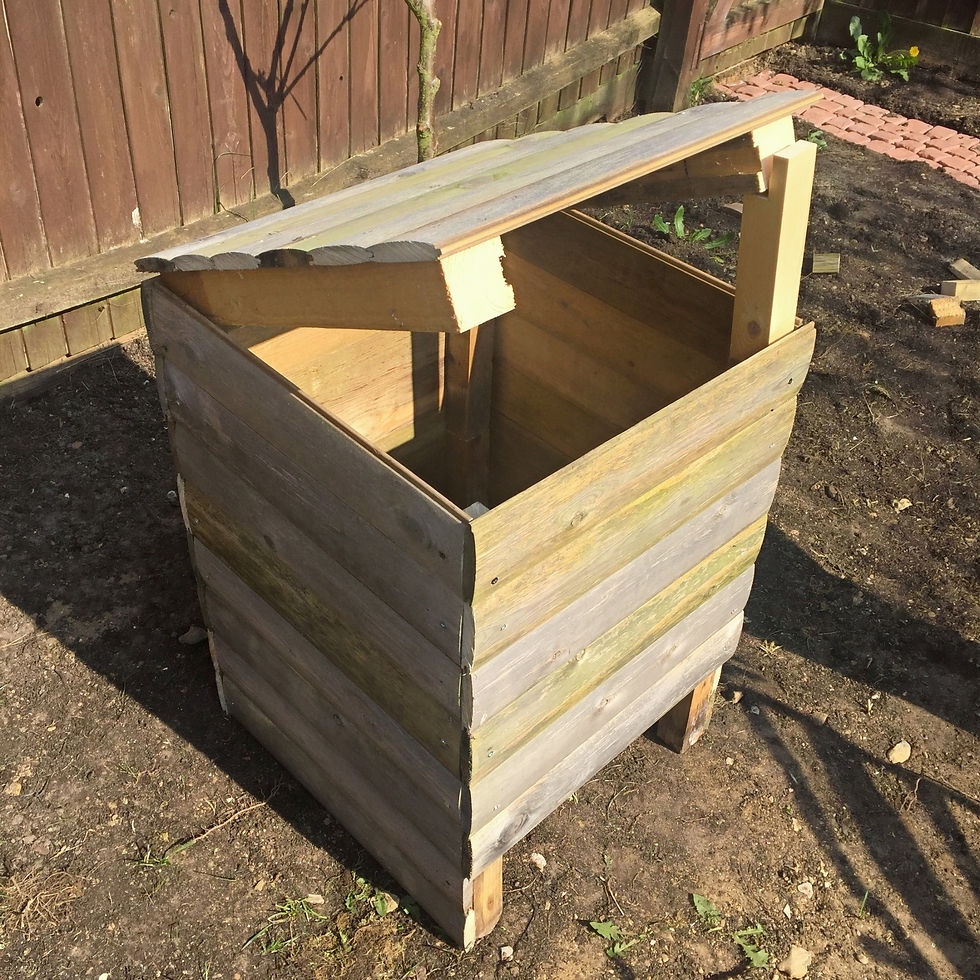
One of the other benefits of this extra time at home has been being able to tackle the growing list of 'things I've been meaning to do, but never seem to find the time'. So far, this has included reorganising the larder and cleaning the barbeque. With the lovely weather we had last week, I was able to give time to another of those 'wish list' projects: building my own compost bin.
With the lovely weather we had last week, I was able to give time to another of those 'wish list' projects: building my own compost bin.

Building a compost bin
I'm no Do-It-Yourself guru, and I will not be offering any advice on how to go about building your own compost bin: I'm sure there are many things I could have done much better. The whole project was an effort to make use of materials we already had at home, which is something I'd challenge everyone to try: reusing and repurposing items you already own requires a little more imagination and ingenuity than buying something ready-made, but the sense of satisfaction at seeing a homemade (and basically free!) object taking shape in front of you isn't to be missed.

I built the compost bin entirely from scrap-wood that came from deconstructing last year's loglap-clad raised beds and the odd collection of screws I have a habit of saving from any DIY project I attempt. The only tools I used were a hand saw, hammer, spirit level and power-drill (as well as a chimneystack repurposed as a workbench: but I'd recommend you use the real thing).

I built my compost bin in three stages: the lower half of the body, with a small gap at the bottom of one side to access the compost; the upper half, with offset legs that slot into gaps on the lower half; and the lid.
The construction process was really simple: I cut the loglap boards into 36 planks of 500mm each, and 8 pieces of scrap 40mm-squared wood to the height of 4 interlocked loglap planks. For the lid, you will need an additional two pieces of scrap wood, roughly 400mm long.
Step one: the lower half
I began by creating two panels by interlocking 4 of the planks, and screwing one of the scrap lengths to the very edges of each panel to hold them together, making sure the planks are off-set from the scrap wood by about 30mm to allow the two halves to fit together later. Then I repeated with another 4 planks, thereby creating two panels, with the legs emerging from the bottom by about 30mm.

I screwed another 4 interlocked planks to the two sides at right angles - remembering the 30mm off-set - creating a three sided a box, and then screwed two additional planks to close-off the final side, aligning these planks with the 'top' of the box. Stand it upright on it's off-set legs: you should have a four-sided square box, with a opening at the bottom of one side (see above).
Step two: the upper half
Repeat the same process for the upper half of the body, though remember you won't need an opening at the bottom of any of the sides of this one, so use 4 planks on the final side, like all the others.

I found it helpful to use the lower half as a stand on which to build the upper half, not just because I don't own a workbench, but also to ensure the two halves are aligned and will fit together at the end (see below).

Step three: the lid
The lid of my compost bin is basically just a longer version of the panels I'd made for the sides. I made sure the 2 remaining 400mm lengths of scrap wood fitted on top of the recessed 'legs' of the upper half along the sides, and then screwed the 6 remaining interlocked loglap panels into these scrap pieces.

Comments